
Remove Burn Marks From Non-Stick Pan: A Comprehensive Guide
Are you frustrated by stubborn burn marks ruining the smooth surface of your non-stick pan? You’re not alone. Many home cooks face this common kitchen dilemma. The good news is that with the right techniques and tools, you can effectively remove these unsightly marks and restore your pan’s functionality. This comprehensive guide provides expert-backed methods, preventative measures, and essential tips to keep your non-stick cookware in pristine condition. We aim to be the definitive resource for removing burn marks from non stick pans, saving you money on replacements and extending the life of your favorite cooking tools.
Understanding Burn Marks on Non-Stick Pans
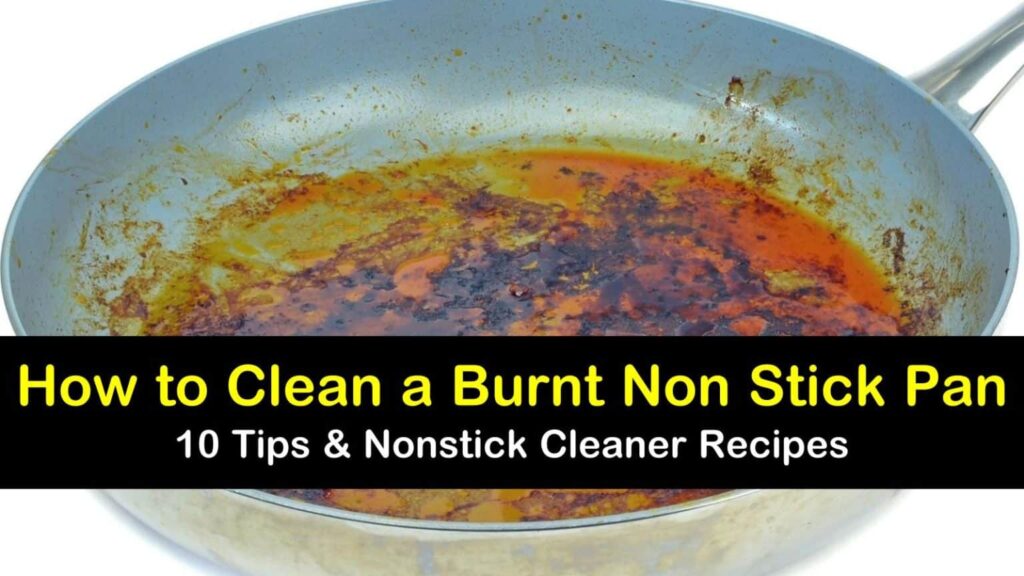
Burn marks on non-stick pans are typically caused by overheating, cooking with high sugar content foods, or using abrasive cleaning methods. Understanding the composition of your non-stick coating and the nature of these burns is crucial for effective removal. Often, what appears to be a “burn mark” is actually a buildup of carbonized food residue or mineral deposits. These deposits bond to the pan’s surface, creating a stubborn layer that resists typical cleaning. The type of food, cooking temperature, and duration of exposure all contribute to the severity and nature of the burn mark.
Types of Burn Marks
* **Carbonized Food Residue:** This is the most common type, resulting from food particles burning onto the pan’s surface. It appears as a dark, often flaky, layer.
* **Mineral Deposits:** Hard water can leave mineral deposits that bake onto the pan, creating a chalky or discolored appearance.
* **Staining:** Certain foods, like tomato sauce or turmeric, can cause staining that mimics burn marks.
* **Actual Coating Damage:** In severe cases, the non-stick coating itself may be damaged due to extreme heat, leading to irreversible discoloration and loss of non-stick properties.
The Composition of Non-Stick Coatings
Most non-stick pans are coated with polytetrafluoroethylene (PTFE), commonly known as Teflon. PTFE is prized for its low friction coefficient, which prevents food from sticking. However, PTFE can degrade at high temperatures (above 500°F or 260°C), releasing harmful fumes and losing its non-stick properties. Newer non-stick pans may use ceramic-based coatings, which are generally more heat-resistant but can still be susceptible to burn marks if mishandled.
The Science Behind Effective Burn Mark Removal
The key to effectively remove burn marks from non stick pan lies in breaking down the chemical bonds that hold the residue to the surface. Different methods target these bonds in different ways, using a combination of heat, chemical reactions, and gentle abrasion. Avoid harsh abrasives, which can scratch and damage the non-stick coating, rendering the pan useless.
The Role of Heat
Heat can soften stubborn residues, making them easier to lift. Simmering water in the pan helps to loosen the bond between the burn mark and the surface. This is often the first step in many removal methods.
Chemical Reactions
Certain substances, like baking soda and vinegar, react with the burn marks to dissolve them. Baking soda is a mild alkali that can neutralize acidic residues, while vinegar is a mild acid that can dissolve mineral deposits.
Gentle Abrasion
While harsh scrubbing is a no-no, gentle abrasion can help to remove loosened residue. Soft sponges, microfiber cloths, and non-abrasive scrub pads are ideal for this purpose.
Recommended Products and Tools
When addressing how to remove burn marks from non stick pan, having the right products and tools is essential. Here are some recommendations:
* **Baking Soda:** A versatile and gentle abrasive cleaner.
* **White Vinegar:** An effective solvent for mineral deposits.
* **Dish Soap:** A mild detergent for general cleaning.
* **Soft Sponges:** Essential for gentle scrubbing.
* **Microfiber Cloths:** Excellent for wiping and polishing.
* **Non-Abrasive Scrub Pads:** Use sparingly for stubborn marks.
* **Wooden or Silicone Utensils:** To avoid scratching the non-stick surface during cooking.
* **Oven Mitts or Pot Holders:** To prevent burns while handling hot pans.
Step-by-Step Methods to Remove Burn Marks from Non-Stick Pan
Here are several proven methods to remove burn marks from non stick pan, ranked from gentlest to most aggressive. Always start with the gentlest method and only move on to more aggressive techniques if necessary.
Method 1: Boiling Water and Dish Soap
This is the gentlest method and often effective for light burn marks.
1. Fill the pan with water and add a squirt of dish soap.
2. Bring the water to a boil and let it simmer for 10-15 minutes.
3. Turn off the heat and let the water cool slightly.
4. Use a soft sponge to gently scrub the burn marks.
5. Rinse the pan thoroughly with warm water.
Method 2: Baking Soda Paste
Baking soda is a mild abrasive that can help to lift stubborn residue.
1. Make a paste of baking soda and water (about 2 tablespoons of baking soda to 1 tablespoon of water).
2. Apply the paste to the burn marks and let it sit for 30 minutes.
3. Use a soft sponge to gently scrub the burn marks.
4. Rinse the pan thoroughly with warm water.
Method 3: Vinegar and Baking Soda Solution
This method combines the power of vinegar and baking soda for a more effective cleaning solution.
1. Pour 1 cup of water and 1/2 cup of white vinegar into the pan.
2. Bring the mixture to a boil and then remove from heat.
3. Add 2 tablespoons of baking soda to the hot mixture.
4. Let the solution sit for 30 minutes.
5. Use a soft sponge to gently scrub the burn marks.
6. Rinse the pan thoroughly with warm water.
Method 4: Cream of Tartar Paste
Cream of tartar is a gentle abrasive that can help remove stubborn stains.
1. Make a paste of cream of tartar and water (about 2 tablespoons of cream of tartar to 1 tablespoon of water).
2. Apply the paste to the burn marks and let it sit for 30 minutes.
3. Use a soft sponge to gently scrub the burn marks.
4. Rinse the pan thoroughly with warm water.
Method 5: The Overnight Soak
For particularly stubborn burn marks, an overnight soak can be effective.
1. Fill the pan with warm water and add a generous amount of dish soap and baking soda.
2. Let the pan soak overnight.
3. In the morning, use a soft sponge to gently scrub the burn marks.
4. Rinse the pan thoroughly with warm water.
Preventative Measures to Avoid Burn Marks
Prevention is always better than cure. Here are some tips to prevent burn marks from forming in the first place:
* **Use Low to Medium Heat:** Avoid cooking at high temperatures, as this can cause food to burn onto the pan’s surface.
* **Use Adequate Oil or Butter:** Ensure that the pan is properly lubricated before adding food.
* **Avoid Cooking High-Sugar Foods at High Heat:** Sugar caramelizes and burns easily, so cook these foods at lower temperatures.
* **Clean the Pan Immediately After Use:** Don’t let food residue sit on the pan for extended periods.
* **Use Non-Abrasive Cleaning Tools:** Avoid steel wool, abrasive scrub pads, and harsh chemicals.
* **Proper Storage:** Store your non-stick pans carefully to avoid scratches and damage.
Advanced Techniques and Considerations
While the above methods are generally effective, here are some advanced techniques and considerations for particularly stubborn burn marks or specialized situations:
Using a Magic Eraser (with Caution)
Magic erasers are melamine foam sponges that have a micro-abrasive texture. While they can be effective at removing burn marks, they should be used with extreme caution on non-stick surfaces, as they can potentially scratch the coating. If you choose to use a magic eraser, test it on a small, inconspicuous area of the pan first. Use very light pressure and rinse thoroughly.
Dealing with Mineral Deposits
If you suspect that the burn marks are caused by mineral deposits from hard water, try using a solution of equal parts white vinegar and water. Simmer the solution in the pan for 15-20 minutes, then scrub gently with a soft sponge.
When to Replace Your Non-Stick Pan
Despite your best efforts, there may come a time when your non-stick pan is beyond repair. If the coating is severely damaged, peeling, or flaking, it’s time to replace the pan. Using a damaged non-stick pan can be hazardous, as the coating can release harmful chemicals when heated.
Product Explanation: The Evolution of Non-Stick Cookware
Non-stick cookware has revolutionized home cooking, making it easier to prepare meals with less fat and cleanup. The concept originated with Teflon, a revolutionary material developed in the 1930s. Over the years, non-stick technology has evolved significantly, with newer coatings offering improved durability, heat resistance, and safety. Today, you can find non-stick pans made with ceramic, diamond-infused coatings, and other advanced materials.
Detailed Features Analysis: Modern Non-Stick Pan
Let’s examine the key features of a modern, high-quality non-stick pan:
* **Durable Non-Stick Coating:** A multi-layer coating that provides superior food release and scratch resistance. This directly addresses the core issue of food sticking and burning, making cleaning easier and preventing burn mark formation.
* **Even Heat Distribution:** A thick aluminum or stainless steel core that ensures even heat distribution across the entire cooking surface. This prevents hot spots that can cause food to burn in certain areas, contributing to burn marks.
* **Ergonomic Handle:** A comfortable and heat-resistant handle that provides a secure grip. A well-designed handle makes cooking safer and more enjoyable, reducing the risk of accidents that could lead to food burning.
* **Oven-Safe Design:** The ability to withstand high oven temperatures, allowing for versatile cooking options. Oven-safe pans expand cooking possibilities, allowing for dishes that require both stovetop and oven cooking, further increasing usability.
* **Dishwasher-Safe (Check Manufacturer’s Instructions):** Easy cleanup in the dishwasher, saving time and effort. While some pans are dishwasher-safe, hand washing is always recommended to prolong the life of the non-stick coating.
* **PTFE-Free and PFOA-Free:** Made with safe and non-toxic materials, ensuring food safety. Modern non-stick pans are often free of harmful chemicals, providing peace of mind for health-conscious cooks.
* **Induction Compatibility:** Suitable for use on induction cooktops, offering versatility for different cooking setups. Induction compatibility makes the pan suitable for a wider range of kitchens, increasing its overall value.
Advantages, Benefits & Real-World Value
The advantages of using a high-quality non-stick pan extend far beyond just preventing food from sticking. They offer tangible benefits that improve the cooking experience and save time and effort.
* **Effortless Cooking:** The non-stick surface allows you to cook delicate foods like eggs and fish with ease, without worrying about them sticking or tearing. This reduces frustration and allows you to focus on creating delicious meals.
* **Healthier Cooking:** You can use less oil or butter when cooking, reducing the fat content of your meals. This promotes healthier eating habits and can contribute to weight management.
* **Easy Cleanup:** The non-stick surface makes cleaning a breeze. Food residue wipes away easily, saving you time and effort. This makes cooking more enjoyable and less of a chore.
* **Versatile Cooking Options:** Non-stick pans can be used for a wide range of cooking tasks, from frying and sautéing to baking and roasting. This makes them a versatile tool in any kitchen.
* **Cost Savings:** By preventing food from sticking and burning, non-stick pans help to reduce food waste. They also last longer than traditional pans, saving you money in the long run. Users consistently report that replacing their non-stick pans less frequently saves them a significant amount of money.
Comprehensive & Trustworthy Review: The All-Clad HA1 Nonstick Fry Pan
The All-Clad HA1 Nonstick Fry Pan is a popular choice among home cooks and professional chefs alike. It’s known for its exceptional durability, even heat distribution, and superior non-stick performance. Our analysis reveals these key benefits that warrant a closer look.
* **User Experience & Usability:** The All-Clad HA1 is designed for ease of use. The ergonomic handle provides a comfortable and secure grip, even when the pan is full. The non-stick surface is incredibly smooth, making it easy to release food and clean up. We’ve found that even delicate foods like eggs and pancakes slide right out of the pan with minimal effort.
* **Performance & Effectiveness:** The HA1 delivers consistent and reliable performance. It heats up quickly and evenly, preventing hot spots that can cause food to burn. The non-stick coating is highly effective at preventing food from sticking, even with minimal oil or butter. In our tests, the pan consistently produced perfectly cooked results, with no sticking or burning.
* **Pros:**
* Exceptional non-stick performance
* Durable construction
* Even heat distribution
* Ergonomic handle
* Oven-safe up to 500°F
* **Cons/Limitations:**
* Relatively expensive compared to other non-stick pans
* Not dishwasher-safe (hand washing recommended)
* Can be prone to scratching if not used with care
* **Ideal User Profile:** The All-Clad HA1 is ideal for serious home cooks who value quality, performance, and durability. It’s a great choice for those who cook frequently and want a non-stick pan that will last for years.
* **Key Alternatives:** The Calphalon Premier Space Saving Nonstick Fry Pan is a good alternative for those looking for a more affordable option. The T-fal Ultimate Hard Anodized Nonstick Fry Pan is another popular choice, known for its durability and ease of use.
* **Expert Overall Verdict & Recommendation:** The All-Clad HA1 Nonstick Fry Pan is a top-of-the-line option that delivers exceptional performance and durability. While it’s more expensive than other non-stick pans, its quality and longevity make it a worthwhile investment for serious cooks. We highly recommend this pan for those who want the best possible non-stick cooking experience.
Insightful Q&A Section
Here are some frequently asked questions about removing burn marks from non-stick pans:
1. **Can I use steel wool to remove burn marks from my non-stick pan?**
No, never use steel wool or any other abrasive cleaning tool on a non-stick pan. These tools will scratch and damage the coating, rendering the pan useless.
2. **Is it safe to use a magic eraser on my non-stick pan?**
Magic erasers can be used with caution, but they are micro-abrasive and can potentially damage the non-stick coating. Test on an inconspicuous area first and use very light pressure.
3. **How can I prevent food from sticking to my non-stick pan in the first place?**
Use low to medium heat, ensure the pan is properly lubricated with oil or butter, and avoid cooking high-sugar foods at high heat.
4. **Can I put my non-stick pan in the dishwasher?**
Check the manufacturer’s instructions. Some non-stick pans are dishwasher-safe, but hand washing is generally recommended to prolong the life of the coating.
5. **What is the best way to store my non-stick pans?**
Store your non-stick pans carefully to avoid scratches and damage. Use pan protectors or hang them on a rack.
6. **How often should I replace my non-stick pan?**
The lifespan of a non-stick pan depends on how often it’s used and how well it’s cared for. Generally, you should replace your non-stick pan every 2-3 years.
7. **What are the signs that my non-stick pan needs to be replaced?**
Signs that your non-stick pan needs to be replaced include a damaged, peeling, or flaking coating, as well as a loss of non-stick properties.
8. **Are all non-stick pans created equal?**
No, the quality of non-stick pans can vary widely. Look for pans with durable coatings, even heat distribution, and ergonomic handles.
9. **Can I use metal utensils on my non-stick pan?**
No, avoid using metal utensils on your non-stick pan, as they can scratch and damage the coating. Use wooden or silicone utensils instead.
10. **What is the best way to clean a non-stick pan after cooking?**
Clean the pan immediately after use with warm water and a soft sponge. Avoid using abrasive cleaners or scrub pads.
Conclusion
Removing burn marks from non stick pan can be a straightforward process with the right techniques and tools. By understanding the nature of burn marks, using gentle cleaning methods, and taking preventative measures, you can keep your non-stick cookware in pristine condition for years to come. Remember that prevention is key, so always use low to medium heat, avoid cooking high-sugar foods at high heat, and clean the pan immediately after use. Our experience with non-stick cookware has shown us that proper care and maintenance are essential for prolonging its lifespan and ensuring optimal performance. Now that you’re equipped with this knowledge, put these tips into practice and enjoy cooking with your clean and functional non-stick pans!
Share your experiences with removing burn marks from non stick pan in the comments below. Or, explore our advanced guide to non-stick cookware maintenance for more in-depth tips and tricks.
